距离上次更新已经 2107 天了, 文章内容可能已经过时。
使用 CloudBase 给静态博客添加评论功能。
申请 CloudBase
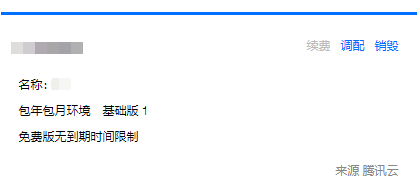
新建CloudBase环境
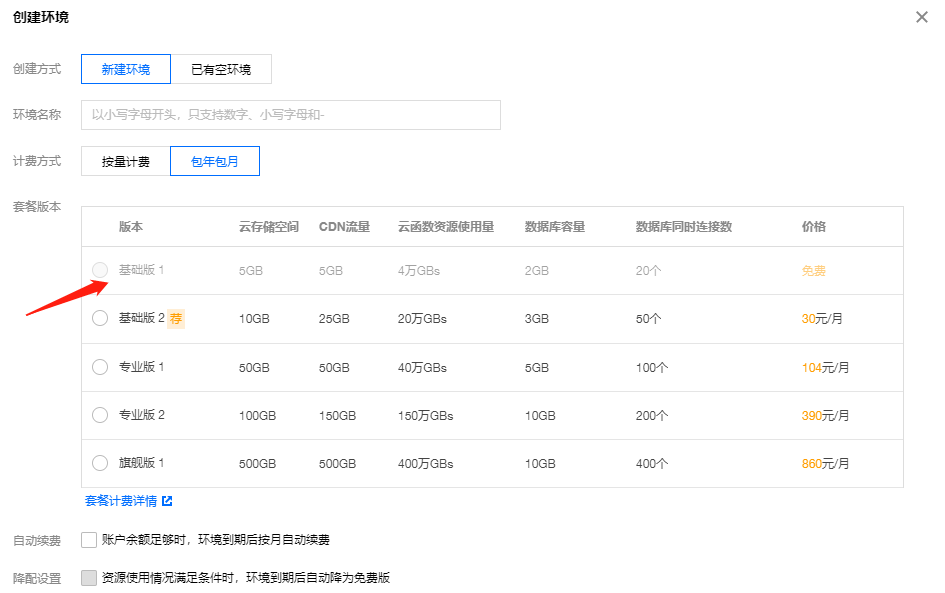
选中包年包月,选择基础版1 (或者选择按量计费,开启免费额度)
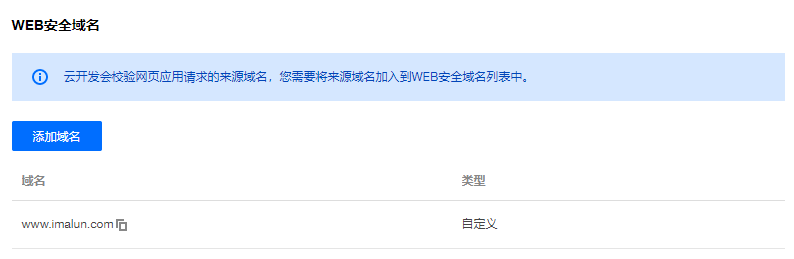
在安全配置->Web安全域名 将自己得域名添加进去
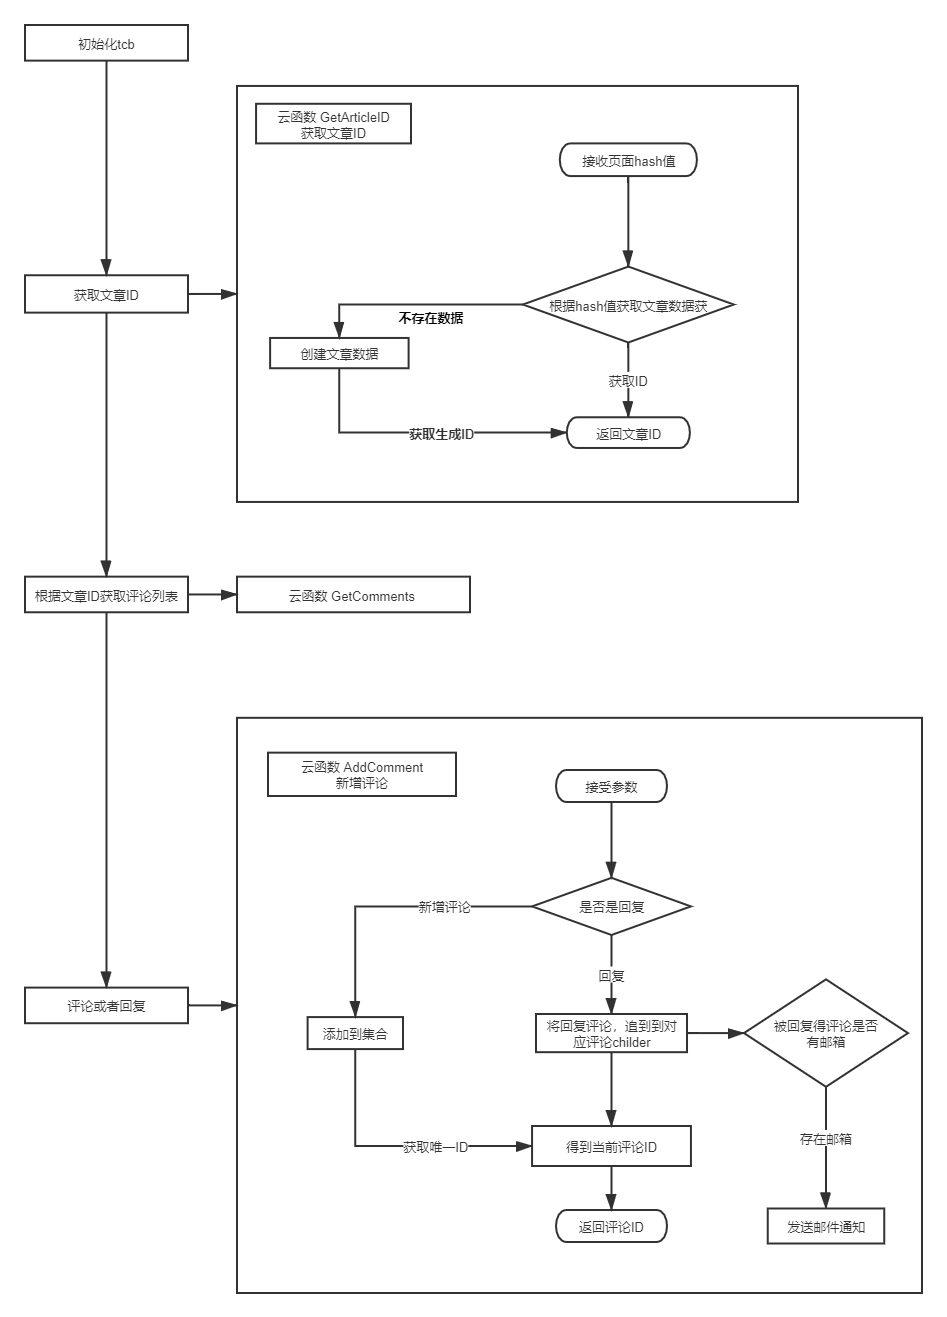
评论大致流程
数据结构
json
{
    "id":"唯一ID",
    "articleID":"文章ID",
    "nick":"昵称",
    "email":"邮箱",
    "url":"链接",
    "date":"时间",
    "content":"评论内容",
    "top":"置顶",
    "childer":[
        {
            "id":"唯一ID",
            "nick":"昵称",
            "email":"邮箱",
            "url":"链接",
            "date":"时间",
            "content":"评论内容",
            "at":{ //回复
                "nick":"昵称",
                "email":"邮箱",
            }
        },
        {
            "id":"唯一ID",
            "nick":"昵称",
            "email":"邮箱",
            "url":"链接",
            "date":"时间",
            "content":"评论内容",
            "at":{
                "nick":"昵称",
                "email":"邮箱",
            }
        }
    ]
}
CloudBase 开发
在 VS Code 安装 tencentcloud.cloudbase-toolkit 插件,直接在 VS Code 上去创建、编写、部署。参考地址 常用操作。 
创建集合
在数据库新增两个集合 article,comments 。 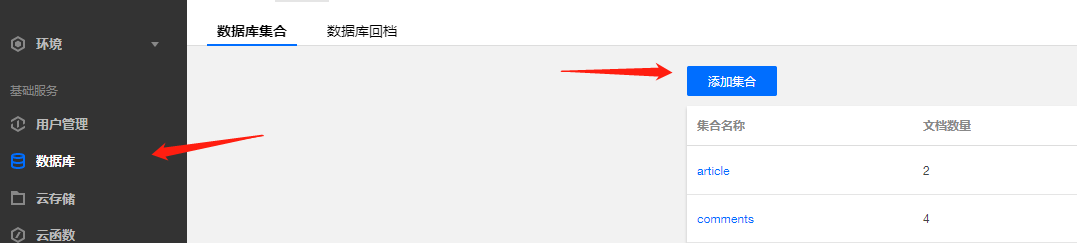
云函数
目前云函数支持 Node,PHP,Python 三种,本文使用 Node 为云函数环境
获取文章ID
新建一个云函数 GetArticleID,代码如下
js
'use strict';
const tcb = require('tcb-admin-node');
const app = tcb.init({ env: '环境ID' });
const db = app.database();
const articleDb = db.collection('article');

exports.main = async (event) => {
    try {
        let { hash, url } = event;
        //根据 hash 获取 article id
        let { data } = await articleDb.field({ _id: 1 }).where({ hash }).get();
        let articleID = '';
        if (data.length === 0) {
            //不存在  新增一条 article 数据
            let { id } = await articleDb.add({ date: new Date(), url, hash, })
            articleID = id;
        } else {
            let { _id } = data[0]
            articleID = _id;
        }

        return {
            success: true,
            data: articleID
        }
    } catch (error) {
        return {
            success: false,
            data: error
        }
    }
}
获取评论列表
新建一个云函数 GetComments,代码如下
js
'use strict';
const tcb = require('tcb-admin-node');
const app = tcb.init({ env:"环境ID" });
const db = app.database();
const _ = db.command;
const $ = _.aggregate;
const commentsDB = db.collection('comments');

exports.main = async (event, context) => {
    let { pagesize, articleID = '' } = event;
    if (isNaN(parseInt(pagesize)) || pagesize < 1) {
        return []
    }

    let { data: list } = await commentsDB
        .aggregate()
        //查询条件
        .match({ articleID })
        //排序
        .sort({
            top: -1,
            date: -1
        })
        //分页
        .skip((pagesize - 1) * 10)
        .limit(10)
        //指定需要查询字段
        .project({
            _id: 0,
            id: "$_id",
            articleID: 1,
            nick: 1,
            link: 1,
            date: 1,
            content: 1,
            top: 1,
            childer: {
                id: 1,
                nick: 1,
                link: 1,
                date: 1,
                content: 1,
                at: {
                    nick: 1,
                    link: 1,
                }
            }
        })
        .end()

    return list
};
新增、回复
新建一个云函数 AddComment,代码如下 使用 nodemailer 来发送邮件通知,nodemailer 参考文档
js
'use strict';
const tcb = require('tcb-admin-node');
const nodemailer = require('nodemailer');
const uuid = require('node-uuid');
const app = tcb.init({ env:"环境ID" });
const db = app.database();
const _ = db.command;
const $ = _.aggregate
const comments = db.collection('comments');

//邮件配置
const config = {
    host: 'smtp.qq.com',
    port: 465,
    secure: true,
    auth: {
        user: '邮箱@xx.com',
        pass: '密码或者授权码' //推荐使用授权码
    }
};

let transporter = nodemailer.createTransport(config);


exports.main = async (event, context) => {
    let { articleID = '', url = '',  nick = 'Anonymous', email = '', link = '', content = '', at = false, istop = true, topID = '', userID = '' } = event;

    if (content == '' || articleID == '' || (!istop && topID == '')) {
        return { success: false, data: '数据格式有误' };
    }

    let date = new Date();
    let par = { userID, articleID, content, url, nick, email, link, at, istop, date }

    if (at) {
        par.id= uuid.v1().replace(/\-/g,'');
        let res = await comments.where({ _id: topID }).update({ childer: _.push([par]) })

        let _atemail = await getEmailByID(at.id);
        if (!!_atemail && _atemail != email) {
            sendemail(_atemail, nick, content)
        }

        return { success: true, data: { date } }
    } else {
        let { code = false, message, id } = await comments.add(par)
        return { success: !code, data: !code ? { id, date } : message }
    }
};

/*
*根据回复id获取 对应人 邮箱
*/
async function getEmailByID(id) {
    let { data } = await comments.where({ _id: id }).get()
    if (data.length === 0) {
        let { data } = await comments
            .aggregate()
            .match({ 'childer.id': id })
            .project({
                _id: 0,
                item: $.filter({
                    input: '$childer',
                    as: 'item',
                    cond: $.eq(['$$item.id', id])
                })
            })
            .end();
        console.log(JSON.stringify(data))
        if (data.length > 0) return data[0].item[0].email
        return ''
    } else {
        return data[0].email;
    }
}

/**
 *
 * email 收件人邮箱
 * nick 评论人昵称
 * content 评论类容
*/
async function sendemail(email, nick, content) {
    let date = new Date();
    let str = `${date.getFullYear()}年${date.getMonth() + 1}月${date.getDate()}日 ${date.getHours()}时${date.getMinutes()}分${date.getSeconds()}秒`;
    let mail = {
        from: '白云苍狗 <xxxxx@qq.com>',
        subject: '[白云苍狗][博客] 收到新的回复',
        to: email,
        html: `
        <h2>${nick} ${str} 回复了您<h2>
        ${content}
        `
    }
    return transporter.sendMail(mail);
};
web 端
对 tcb 做一个简单封装
js
export default class tcbComment {

    constructor(env, hash) {
        if (!env) {
            console.error("未设置CloudBase环境id:env");
            return;
        }
        if (!hash) {
            console.error("未设置当前Comment的hash值");
            return;
        }
        this.env = env;
        this.skip = 1
        this.hash = hash;
    }

    /**
     * 初始化
     */
    async _init() {
        let tcb = await TcbLoader()
        this.app = tcb.init({ env: this.env });
        let auth = this.app.auth({
            persistence: "local"
        });
        if (!auth.hasLoginState()) {
            await auth.anonymousAuthProvider().signIn()
        }

        await this.getArticleID(this.hash)
    }

    //获取
    async getArticleID(hash) {
        let res = await this.app.callFunction({
            name: 'getArticleID',
            data: {
                hash,
                url: location.pathname,
            }
        })
        let { result: { success, data } } = res;
        if (success) {
            this.articleID = data;
        }
    }

    //获取评论列表
    async getComment() {
        let res = await this.app.callFunction({
            name: 'getComments',
            data: {
                pagesize: this.skip++,
                articleID: this.articleID
            }
        })
        return res.result;
    }

    //新增
    async addComment(parm) {
        let res = await this.app.callFunction({
            name: 'addComment',
            data: {
                articleID: this.articleID,
                ...parm
            }
        })
        return res;
    }
}

/**
* 加载tcb-js-jdk
*/
const TcbLoader = function (v = '1.6.0') {
    return new Promise((resolve, reject) => {
        if (window.tcb) {
            resolve(window.tcb)
        } else {
            var script = document.createElement('script')
            script.type = 'text/javascript'
            script.async = true
            script.src = `//imgcache.qq.com/qcloud/tcbjs/${v}/tcb.js`
            script.onerror = reject
            script.onload = () => resolve(window.tcb)
            document.head.appendChild(script)
        }
    })
}
小结
弄完cloudbase 云函数,和对 web 端简单使用封装,剩下得就是页面上弄个评论列表组件和评论组件了
- 本文链接:
- 版权声明:本博客所有文章除特别声明外,均默认采用 CC BY-NC-SA 4.0 许可协议。